This week we looked at object animations using the timeline and keys. In the first animation the ball simply bounces. This is done by setting the first frame to have the ball on the ground, a middle frame (in this case 10) has the ball at its peak and then the final frame has the ball back on the ground. The software interpolates between these frames to create a smooth animation.
The second video is similar but this time the ball squashes like a real ball when it hits the ground. In this animation the first and last frames have the ball in the air and the middle frame has the ball on the ground where it has been scaled to look squashed.
Thursday, 26 February 2009

Thursday, 5 February 2009
Building a rig, and skining


Firstly we built a very simple mesh, the rough shape of a human body, out of cubes. We made this on one side of the x-axis, then mirrored the geometry onto the other side, to make sure that both sides were identical.
We then drew out a skeleton (rig) using Maya's Joint Tool, making sure that we left bends in the legs and arms, so that when we came to add IK chains to them it would know which way our joints should bend. Once the rig was built for one side of the body, we mirrored it over the x axis so it was identical for both sides of the body.
Next we skinned the mesh to the rig, by going to Skin > Bind Skin > Smooth Bind. This allows the bones to affect the vertices of the mesh, so when we move the IK handles, we can pose the body. We then keyframed a very (very) simple run animation, which you can see by clicking below.
Thursday, 29 January 2009
Texture and UV mapping
This week we experimented with UV mapping, simple shaders such as Blin and toon. We applied a spherical UV map to the head before applying the texture. Above is the texture map we created. In the UV texture editor window (in UV mode). Select all the UVs and then UV snapshot from the Polygon menu. This will output the image and you can then simply draw on it. The blockiness of texture here is because the image we output was quite a low resolution. To apply the texture right click the object and select Assign new material. Then we chose blinn. From the side menu bar choose color->file and select the image.
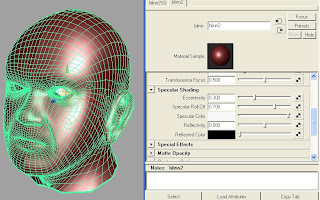
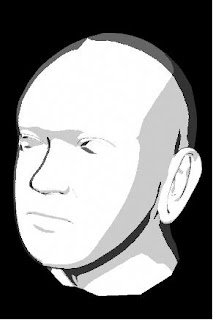
 Above is the UV map for the head. We chose spherical mapping from the Create UV menu so that it would unwrap the head as if it were a sphere. Below is a toon rendering of the head done by selecting the object, then selecting the toon tab and picking a style and finally rendering.
 Above is the texture map we created. In the UV texture editor window (in UV mode). Select all the UVs and then UV snapshot from the Polygon menu. This will output the image and you can then simply draw on it. The blockiness of texture here is because the image we output was quite a low resolution. To apply the texture right click the object and select Assign new material. Then we chose blinn. From the side menu bar choose color->file and select the image.
 Above is the UV map for the head. We chose spherical mapping from the Create UV menu so that it would unwrap the head as if it were a sphere. Below is a toon rendering of the head done by selecting the object, then selecting the toon tab and picking a style and finally rendering.
Subdivision and Texturing
 Below is an example of a subdiv proxy. Here we half a sphere and use Proxy->Subdiv Proxy to make a smoothed mirror image. By manipulating the vertices on the original half we can also change the positions of the vertices on the smoothed mirror image.
 Below is an example of smoothing. By selecting Mesh->Smooth you can choose how many subdivisions you want.
We experimented with smoothing meshs in Maya by subdivision. We then used another smoothing method called Subdivision Proxy, which creates a smoothed version of the low-poly mesh you're working on, which updates when you edit it's vertices.
We then created a simple coke bottle, by extruding faces from a cylinder and scaling their vertices, and applied a coke bottle texture to it. This required some simple editing of the bottle mesh's UVs, so that the texture would be applied properly.
Thursday, 15 January 2009
Lab 1

During this lab we learnt to draw a cube, sphere, and cylinder, and position, rotate and scale them, as well as render them, in Blender.
Subscribe to:
Posts (Atom)